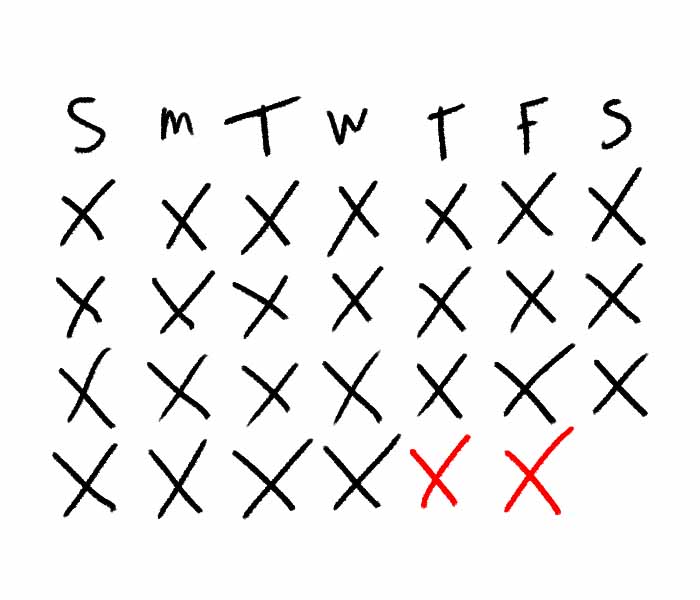
60-Day Challenge
This is an at-home training program designed to help you build an x-shaped physique and tighten your body better than a vacuum sealer could. This program calls for daily training, but the workouts don’t take long. The first month, you’ll finish most of them in under ten minutes. The second month, you’ll probably need twenty.
You do the same exercises (pretty much) EVERY SINGLE DAY for 60 straight days. You can vary each exercise mildly whenever you want. Variation isn’t necessary, though…
There are four total categories:
- Upper-body push
- Upper-body pull
- Lower-body
- Abs
The exercise you choose to do within each category depends on your current strength level. Here’s what I recommend:
PUSH
HARDER: REGULAR PUSH-UPS
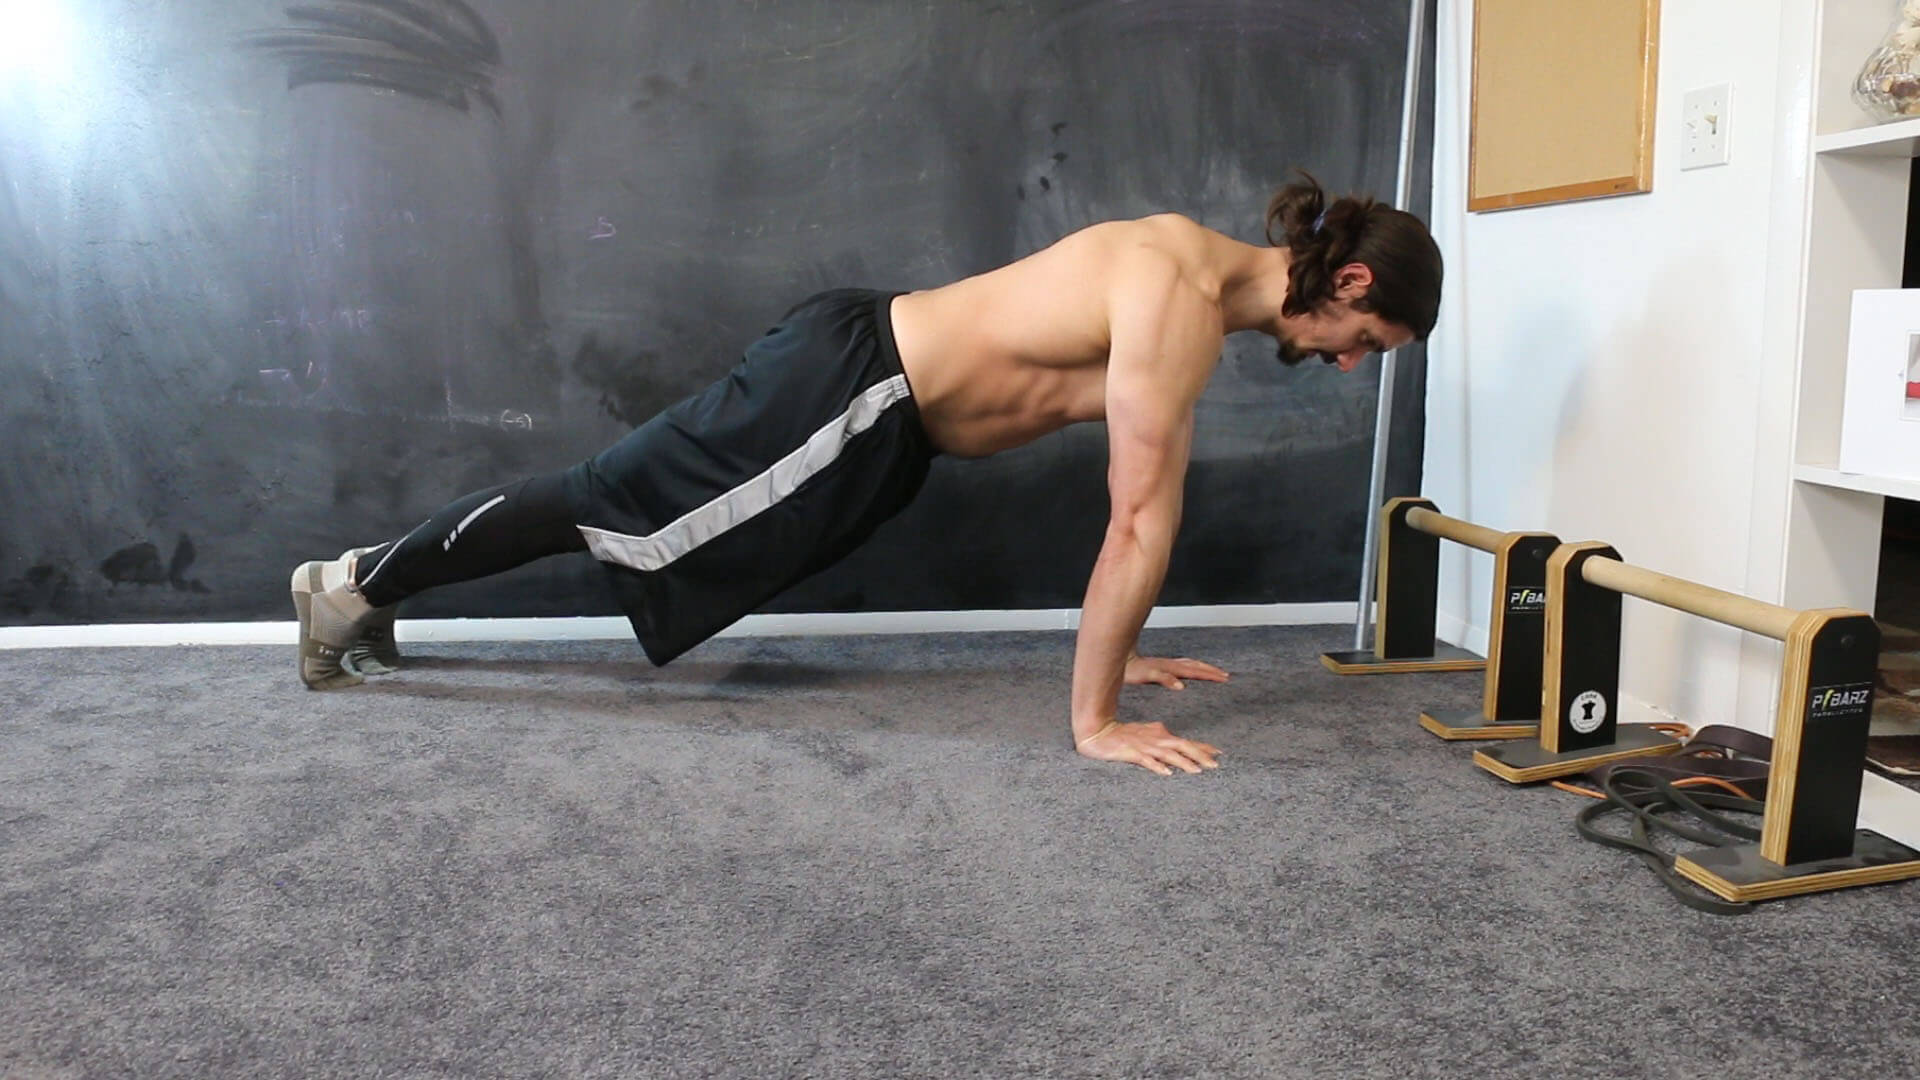
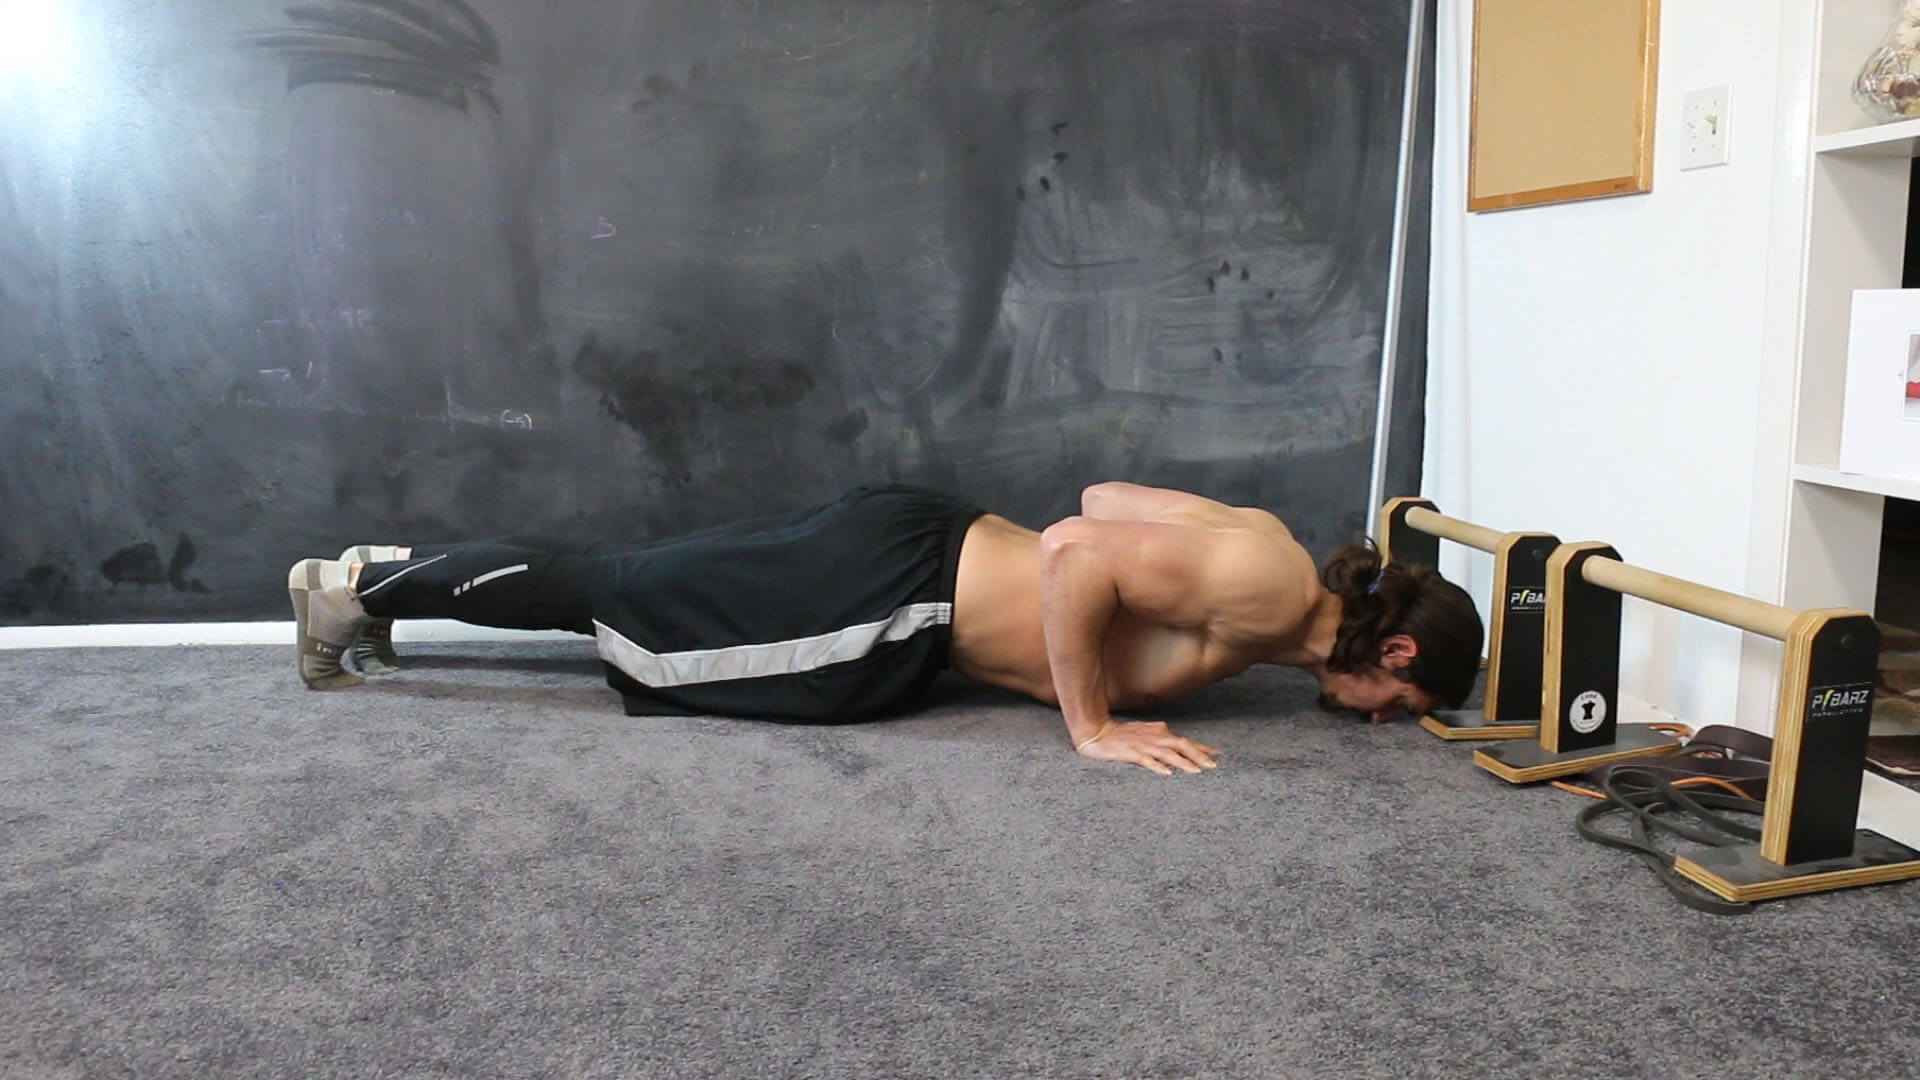
If you can’t do more than five push-ups using a FULL range of motion (chest/nose touching the ground), you should do an easier variation.
EASIER: CHAIR PUSH-UPS
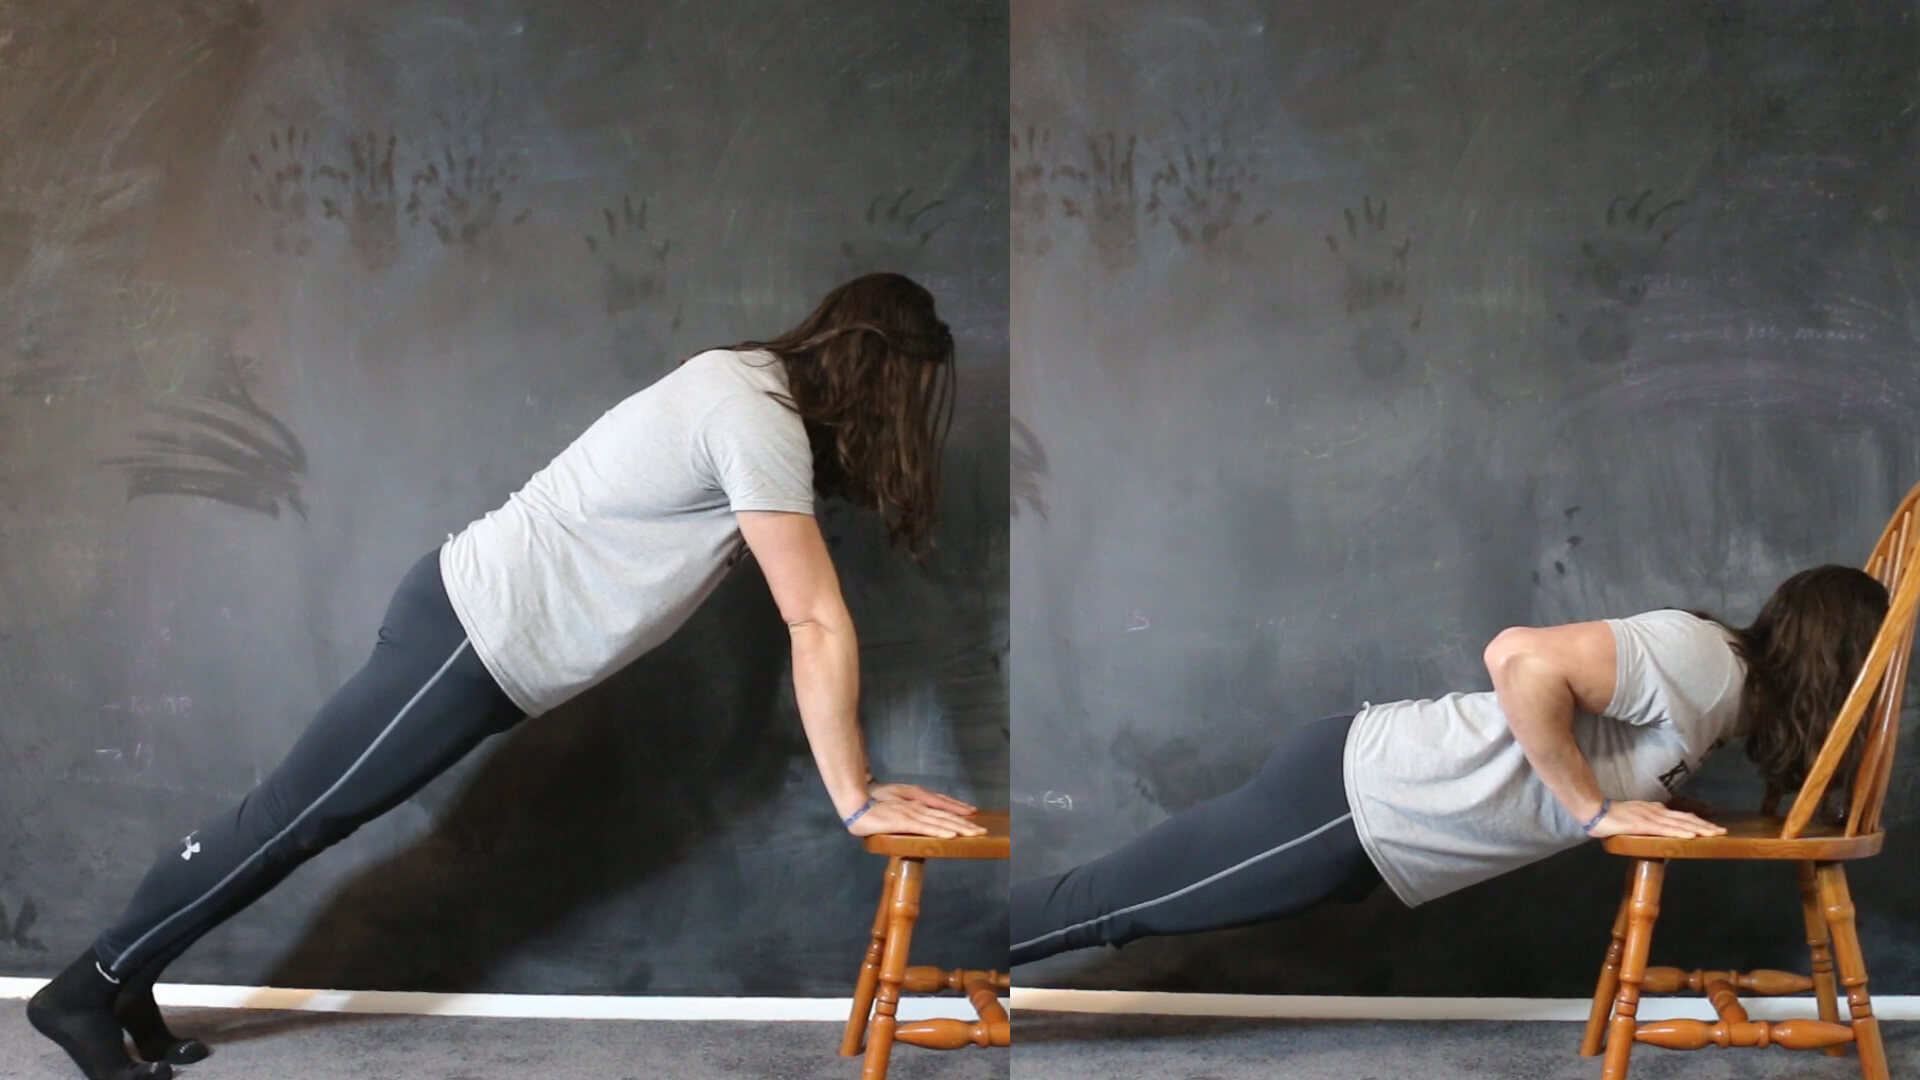
Put a chair (anything sturdy) against a wall. Do your push-ups on the chair. The higher you incline your torso, the easier the push-ups will be… but you don’t want to make them too easy. If you can do 15-20+ reps with ease, make the push-ups more difficult.
(Elevating the hands is a better regression than doing push-ups on your knees. Knee push-ups disengage the midsection and the lower body. They don’t teach you how to maintain a strong body line, which can cause problems when transitioning to the regular push-up.)
EXTRA: FEET & HAND-ELEVATED
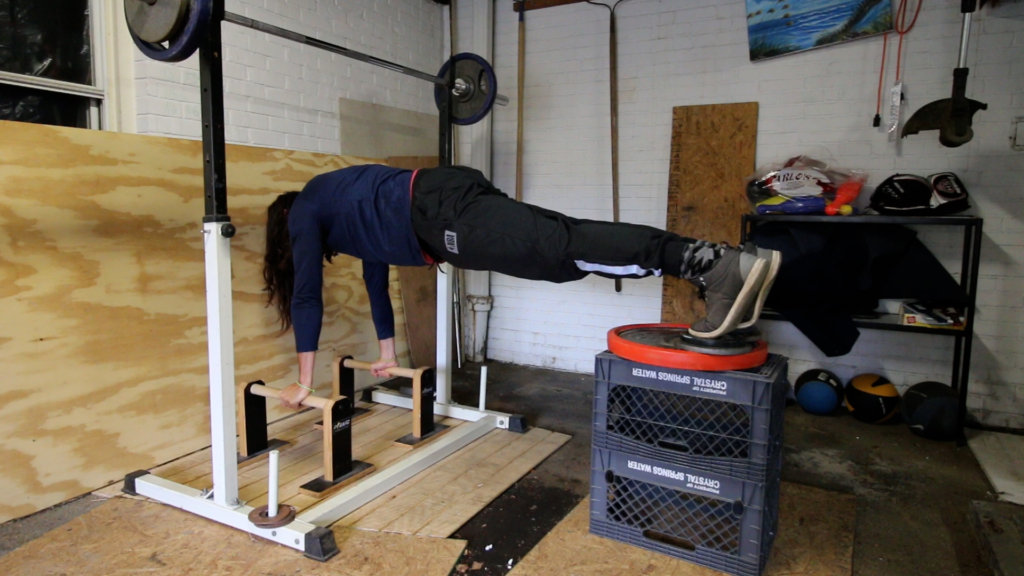
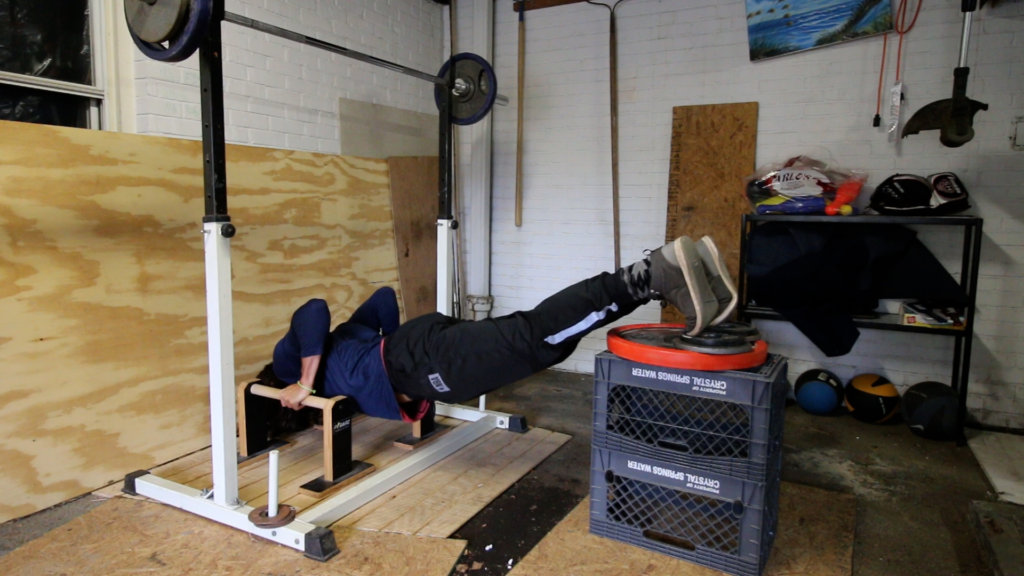
You can also do push-ups with your hands and/or feet elevated. This is a good choice if you can currently do more than 20 consecutive push-ups. I’m doing push-ups on parallettes, but you can use cinder blocks, which are only a few bucks at most hardware stores.
PULL
HARDER: BODYWEIGHT ROWS


Bodyweight rows can be done a few different ways, but they’re most often done inside of a power rack. I’m assuming you’re doing this program at home, which means you’ll have to get creative. There are a few options.
Pull-up bar option
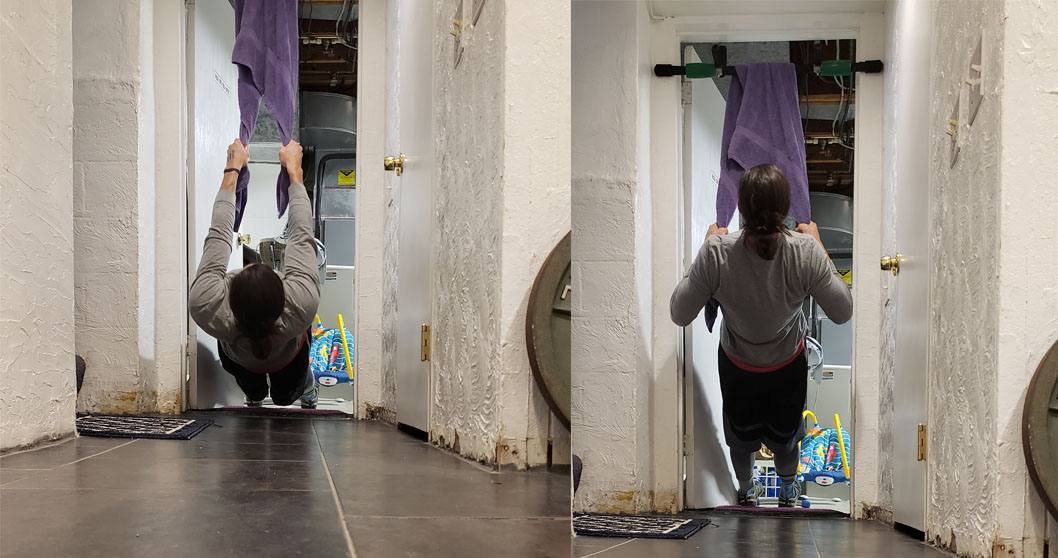
Get a doorframe pull-up bar on Amazon (or your local sporting goods store). I have an Iron Gym. Second, loop a towel or a bedsheet around the pull-up bar. Now you can do rows. (Make sure you pull the towel/bedsheet in the direction the pull-up bar is most sturdy.)
Gymnastics rings option
If you have high ceilings and a knack for construction, you can install gymnastics rings in your house.
TRX option
TRX straps are another type of suspension device. In my opinion, TRX straps are much less versatile than gymnastics rings. Given the option, I’d go with rings. However, TRX straps are easier to install and attach to a doorframe.
EASIER: BRIDGE ROWS
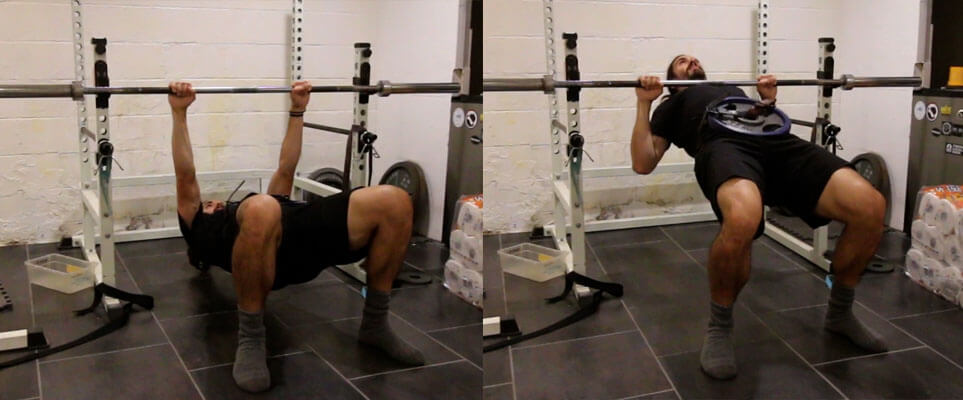
Bodyweight rows are similar to modified push-ups. The higher your body angle, the easier they are. So one way to make them easier is to do them at a more inclined angle. Another way to make them easier is to do bridge rows: bend your knees. In the picture above, I’m doing bridge rows with a weight attached to my torso, but you’d do them without extra weight.
ANOTHER OPTION
If you don’t have anywhere to do rows, you can do banded facepulls, as long as you have somewhere sturdy to anchor the band. There are many different band brands and many different bands underneath each brand. The band you need ultimately depends on your strength, but the #1 and/or the #2 band from Serious Steel should cover your needs for now.
EXTRA: PULL-UPS/CHIN-UPS
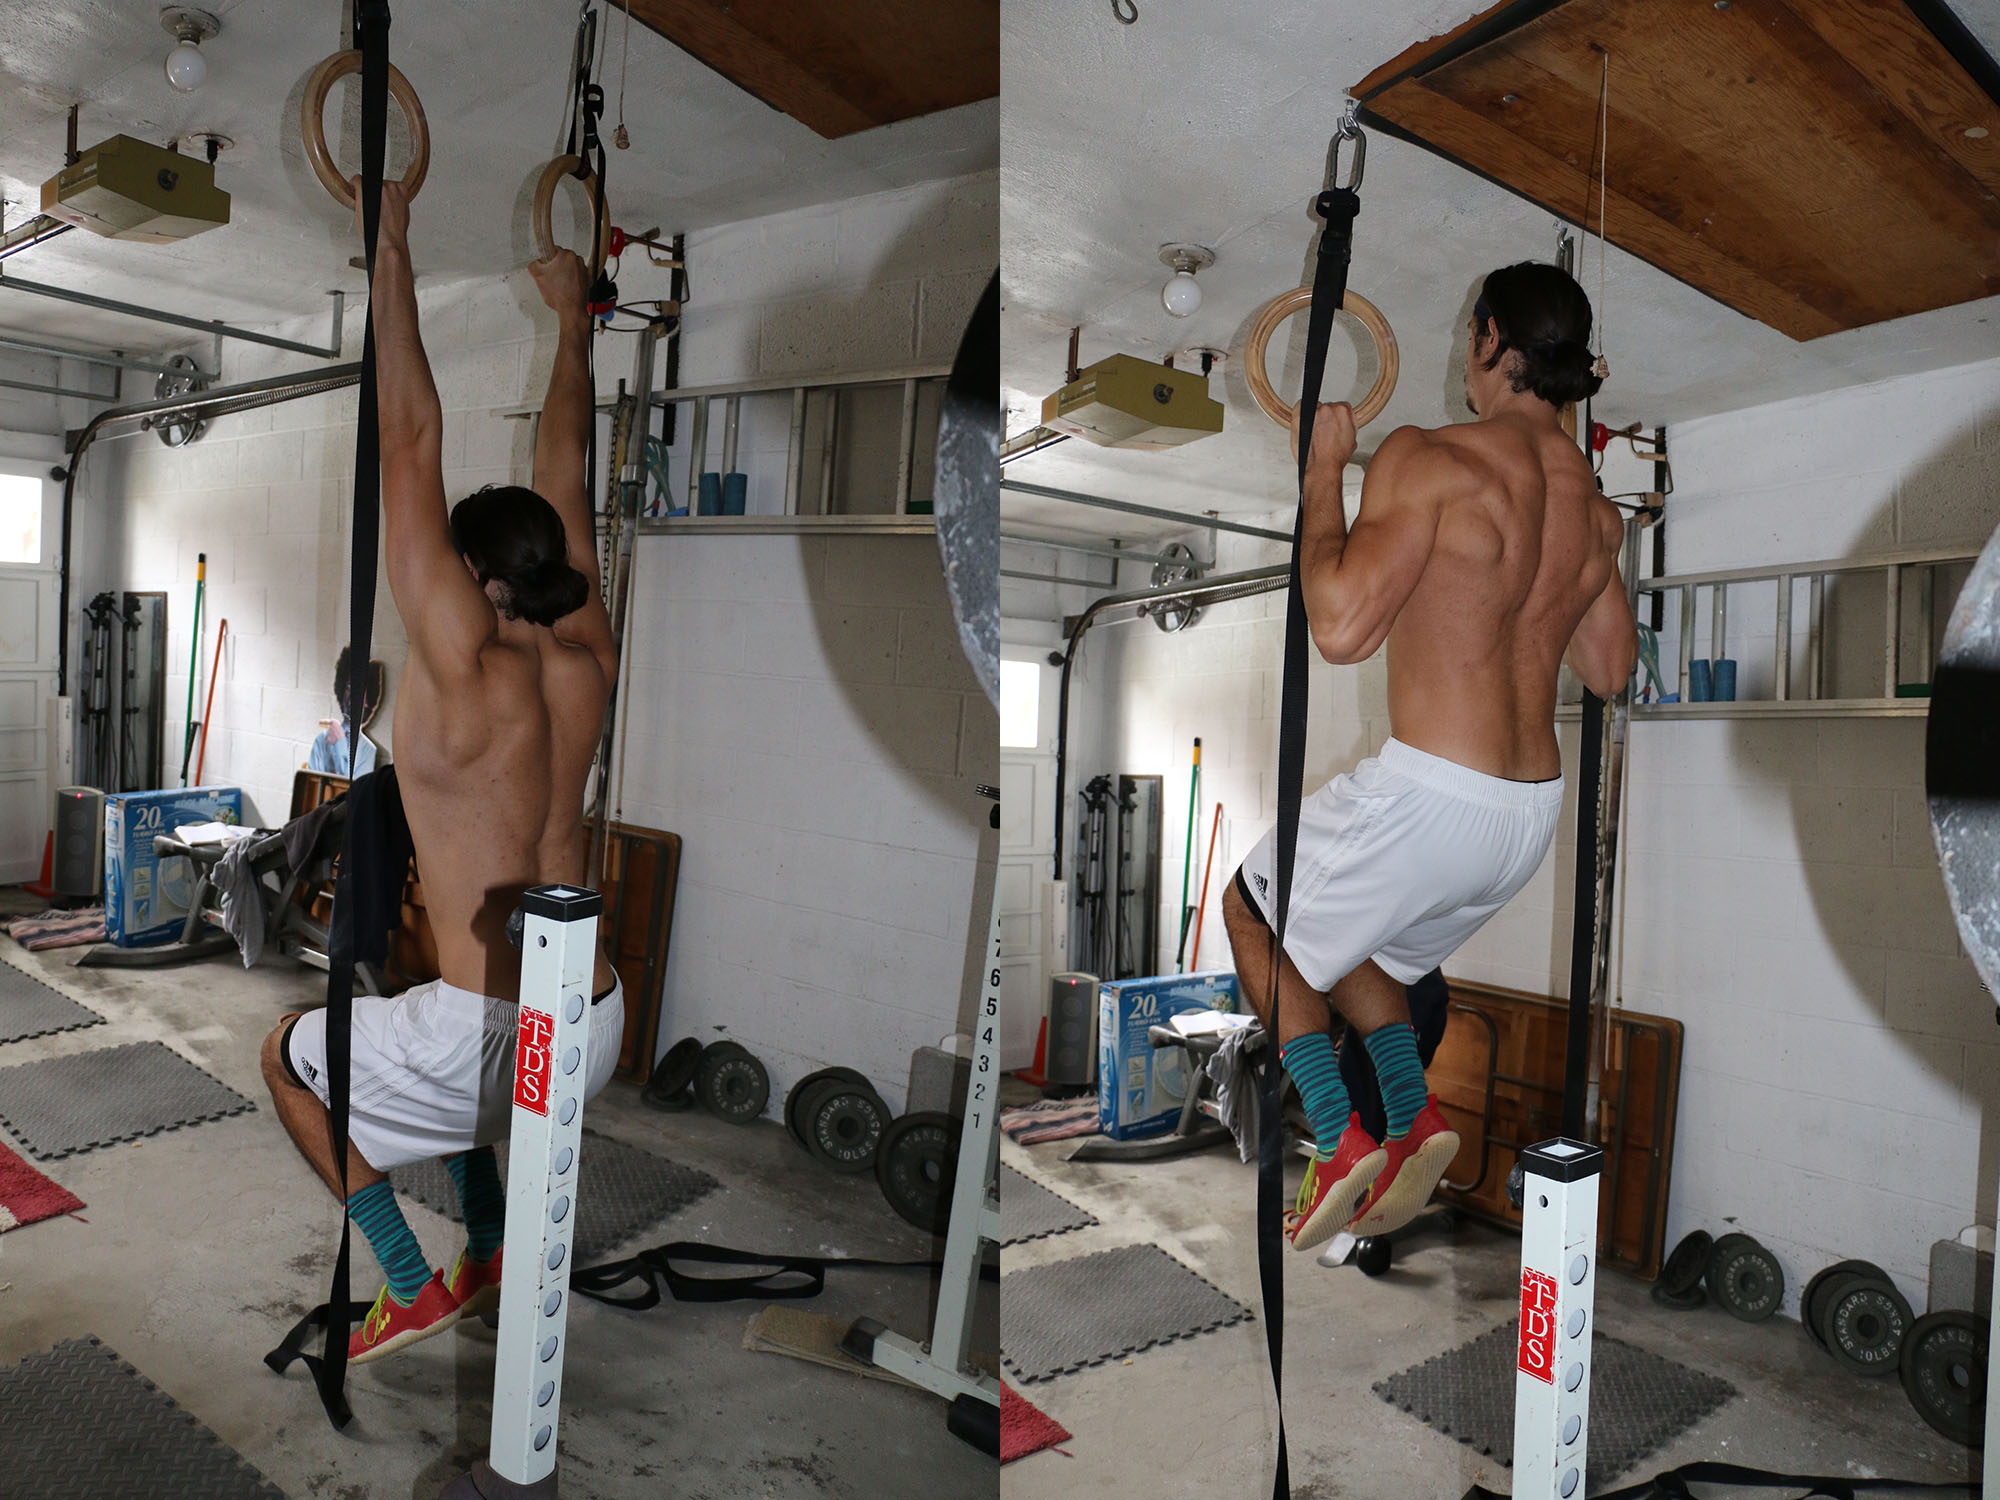
You can also do this program with pull-ups or chin-ups if you are strong enough. If you can’t do more than three pull-ups using a FULL range of motion (lowering to straight arms), then pick an easier exercise.
LOWER
HARDER: SPLIT SQUATS
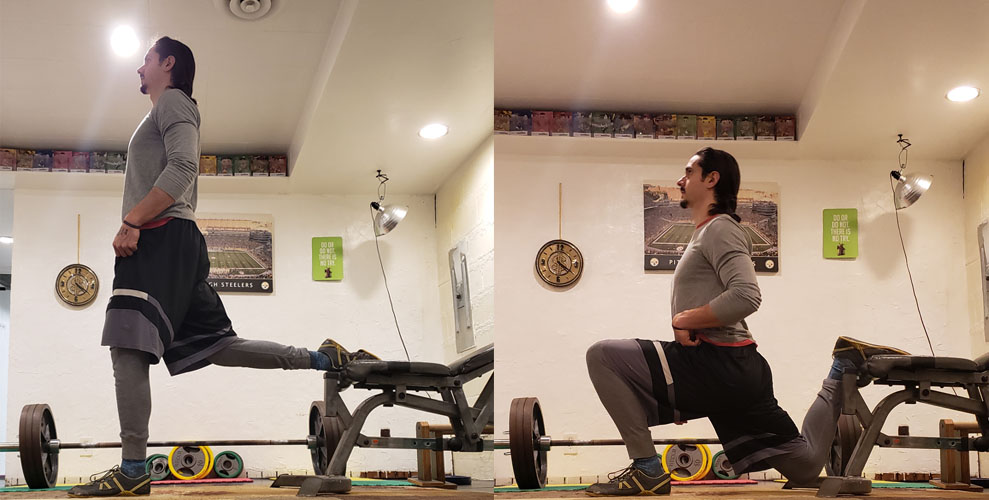
Place one foot on a sturdy object behind you. Extend your “lead” foot in front of you. Drop your hips to the floor. Descend until your thigh is AT LEAST parallel to the floor. In an ideal world, you’d descend until the crease of your hip goes below the level of your knee.
If you’re coming up on your toes or you’re struggling to reach decent depth, extend your lead foot in front of you a little further.
EASIER: BODYWEIGHT SQUATS
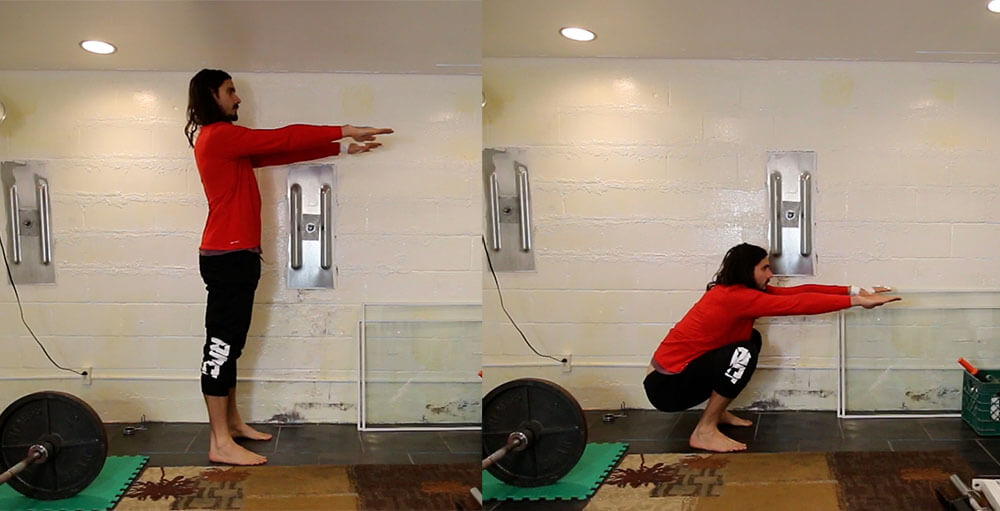
With your feet around shoulder-width apart and your toes pointed out 10-30 degrees, drop your butt to the floor as vertically as you possibly can, descending until the crease of your hip is at least below the level of your knee. Keep your entire foot glued to the ground; don’t come up on your toes.
ABS
TUCK-UPS
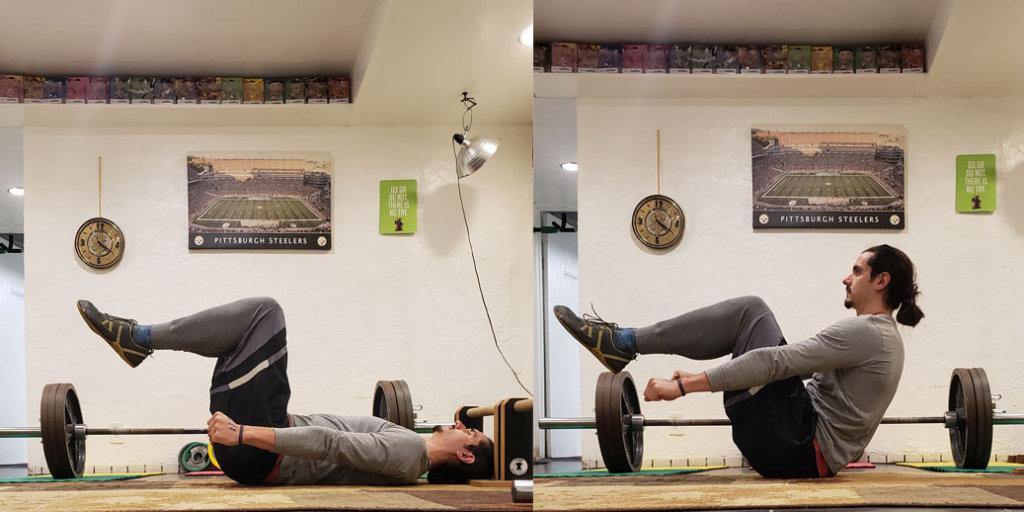
Hips and knees at a 90-degree angle. Push your lower back into the ground. Keep your arms extended towards your feet. From here, curl your spine one vertebrae at a time until your torso contacts your thighs. This should be slow and controlled. Avoid moving your arms about and swinging them to get momentum.
Let’s assume you’re going to start with the following exercise:
- Push-ups
- Bridge rows
- Bodyweight squats
- Tuck-ups
Do each exercise for 10 repetitions on day one. Add one repetition to each exercise, every single day.
Day one, you do:
- 10 rows
- 10 push-ups
- 10 squats
- 10 tuck-ups
Day two, you do:
- 11 rows
- 11 push-ups
- 11 squats
- 11 tuck-ups
Day three, you do:
- 12 rows
- 12 push-ups
- 12 squats
- 12 tuck-ups…
You’ll eventually be doing 60+ reps of each exercise, every single day, for one week straight. When you finish this program, you’ll have amassed 2370 reps for each exercise. Your body WILL respond to this volume. It won’t have a choice.
Here are some notes:
1. If you’re doing split-squats, do “x” reps per leg. Day one, you do 10 reps per leg.
2. You can finish the workload in any set/rep combination you want. The first few days, you’ll probably be able to finish the reps in one or two sets. As time goes on, you’ll have to break the workload into multiple sets.
Feel free to change set/rep scheme on a daily basis, pending how you feel. Here’s an example, assuming you’re on day 40 and scheduled to do 50 total reps of each exercise.
Previously, you were hitting sets of 8 to 10 reps on each exercise. But, today, you’re toast. Your body is tired. Instead of doing higher rep sets, you can do sets of, say, 5 reps. It’ll take more sets to reach your daily rep goal (50 in this example), but that doesn’t matter. The only thing that matters is amassing the total number of reps.
In the long run, I prefer using set/rep schemes that minimize muscular fatigue, as opposed to metabolic fatigue. For instance, if you’re doing 26 total reps, you could do 12-12-2. But I’d rather do 9-9-8 or 10-8-8.
Spreading the workload evenly across sets keeps your heart rate high, which is never a bad thing.
3. The most important part of this program is finishing the reps. Initially, strive to do all of the reps for every exercise in one “session.” If you can’t, feel free to spread the reps throughout the day. If you’re scheduled to do 50 total reps, you can do 25 in the morning, then 25 in the afternoon.
Personally, I like condensing all of the reps into one session. This gives you a daily metabolic hit and makes things more challenging (in a good way).
4. Stick with the progression. Don’t do more reps, even in the early days of the program. The first thirty days won’t be very challenging, and you might feel inclined to do more. Doing so will interfere with what’s to come, as the volume SKYROCKETS.
- Days 1-30: 735 total reps.
- Days 30-60: 1,635 total reps.
The last few weeks of the program, you’ll be doing 50+ reps of each exercise, every single day. Keeping the volume low in the beginning (as called for) will prepare your body for the latter half of the program, and reduce accumulated fatigue over the life of the program.
5. Use variety, if needed. You can rotate between variations of each exercise, as long as they are similar. For instance, you can rotate between neutral grip pull-ups, “regular” pronated grip pull-ups, and supinated grip chin-ups. You could also alternate between wide grip pull-ups, narrow grip pull-ups, etc…
There are a ton of options. Stick to the scheduled workload, and don’t take HUGE leaps. Don’t go from bodyweight rows to pull-ups, for instance.
6. Think about your order. For optimal recovery in between exercises, I recommend doing pulls first, pushes second, abs third, and lower-body fourth.
7. You might be sore here and there, but you don’t have to be sore. Soreness isn’t a reliable indicator of an effective workout, so don’t feel like you have to be sore or you should be sore.
8. It’s okay to do the workout even if you are sore. You’ll probably feel better afterward.
9. You can do other training. This program has a low barrier to entry. I created it this way purposefully. You can do this program atop a more serious barbell strength training program if you’re advanced.
10. Make some momentum. One of the beautiful aspects of this program is the way it builds. The early days are easy. There’s not much friction to doing the workout. By the time the workouts get difficult, you’re already in stride. You’re used to training every single day, and you’ll be more likely to complete the workouts, even if you aren’t motivated.
